Showing posts with label black. Show all posts

Wednesday, April 4, 2012

Easter Bunny Spring Nails & Tutorial

Hiyo! I'm really proud of the manicure I have for you all today! 
I know I've only been posting swatches lately and I started to guilty that I hadn't done any nail art.
But since we are having a little Easter Egg Hunt at work this weekend, I figure I might as well get into the spirit of things and go all out! :D 

So I present to you a fun and fresh Spring inspired Easter Bunny Manicure set! 


I had a lot of fun coming up with this look. And was trying to go for an egg inspired decoration theme. Throw in some bunny rabbits, paw prints and then voila! Done! 


Here is a close up of my two favorite nails! Out of all the rabbits I did, this little guy is by far my favorite. I think it was all the practice on my right hand :P  Also if you guys are interested, I did an easy Bunny Rabbit Nail Art Tutorial here for you so that you can have this cutie too!


I also really loved how these flowers turned out. This is my second time trying out this style. You can check out my first Floral Attempt here at my St. Patty's Day Nails.

Finally the last two nails, For my ring finger I went with a fun Easter Egg Design with Stripes and Dots. And then I added some diagonals with a toothpick to pull it all together. 

My Lacquer List for this Look


Base coat from Left to Right: 
Sally Hansen Hard As Nails - No hard Feelings
Sally Hansen InstaDri - Blue-Away
Sally Hansen InstaDri - Pink Blink

Accent Colors: 
Pa. Dark Pink Sparkle AA20 for the Floral Centers
Sephora by OPI - Never Enough Shoes for Eyes 
Sephora by OPI - A-ha! Moment for the Flowers, Rabbits, Stripes & Dots  
Pa. Light Pink Sparkle A116 for the Bunny Cheeks 

Also, I threw together a cute little Picture Step - by - Step tutorial for you on how to do the Bunny! 
It was really easy and turned out way cuter than I expected. I just used my dotting tool for the most part with varying pressure. 

Well I hope you all enjoy this look! Anyone else getting Festive Fingers for this weekend? I'd love to see too! I'm more into painting Nails than Eggs it seems :P 


Thanks for Dropping by and pleas share if you try out the Bunny! 
-wanyachu  

Thursday, March 8, 2012

Zoya Jules + Konad Argyle Tips

Hi all! Thank you for patiently waiting for my next post >_<; Luckily everything is working out just fine with my doggie and she is going to get the drain taken out today! Yippie! 

So even though things have been kinda hectic I managed to squeeze in some ManiMe time and here are my nails for this week ~ 


I recently snagged this golden Zoya nail polish Ulta for half off! *love deals* After trying my first Zoya lacquer in Kelly gray, which I posted about here, I was dying to get my hands on another! And sure enough it did not disappoint ^_^


This golden-silver polish is aptly named Jules thanks to the multicolored micro-glitter suspended in the semi-opaque base. And before you jump on me about how can things be "golden silver" think of Antique Pewter teapots. In direct sunlight, above, it is an elegant gold with hints of cool silver but in the shade, below, it takes on a steely quality with a warm undertone.


It really is the epitome of a mixed metals look which makes it a versatile neutral without being boring beige. I especially love the different colors that get caught in the tiny glitter which run the spectrum from greens, yellows, oranges and reds. It is like they took a handful of jewels, ground them up into dust and poured it in. <3 


Unfortunately, my camera and lighting just aren't doing Jules justice but at least you can get a closer look at the Konad m60 plate design I used to stamp the tips. Once again I used my previous taping trick to get clean lines for my french tips. I rubbed on some Sally Hansen Insta-Dri in Night  Flight and voila! 


Simple, Fast, and Elegant! 

Thank you so much for reading! And please lemme know if you have any questions :D 

-wanyachu

Wednesday, January 18, 2012

Bling & Art Deco Lilac Black Manicure

Hi again! I'm back and with a special manicure for you all this week!
I'm calling this one Blinging Deco Black Yeah! as a play on Bring Deco Back in celebration of my new Blog look. :D *play overrated popsong in BG*
I liked the strong lilac & black contrast and thought it was very reminiscent of the art deco period. Also, since I lucked out and had time off the job I decided to add some crystals, knowing there was a reduced risk of them falling out :3
Sweet and simple, with a touch of glamor.
I did two coats of Sally Hansen Hard as Nails in No Hard Feelings as my base. Then tipped out with classic frenchies in Sally Hansen Insta-Dri – Night flight. Next I adhered some small white crystals with my clear coat, and finished up with another layer of top coat~
I actually adore adding crystals & small plastic pearls to my nails, but usually they just get in way too much >_< So this was a nice little treat for myself!
Hope you all enjoyed this look and my new background too! :D
- wanyachu

Sunday, January 8, 2012

Nail Inc. - Donmar New Year Nails

Hi all ~ I finally got my hands on this Nail Inc. lacquer set – The Donmar Collection.
My sister actually gave this to me for Christmas and I decided to do my New Year Manicure with it!

So here is what I was sporting on my tips a week ago to ring in 2012 :P

Isn't it super PRETTY! *g* I'm so in love with the irregular cut, holographic sparkles in the top coat. They glimmer an orange/green depending on the light <3 just like an opal!!!

Here is the super spiffy packaging. So drool worthy right? Also, I think they captured the range of color that the sparkles give off better than any picture I took so I wanted to share.

The base coat, Chelsea, is described as a “plum black” but I think its more of a dark maroon even though you can't really tell from the pictures. Not that it makes a huge difference since the star of this set is really the Donmar top lacquer.

My favorite part about this look is that the glitter is a separate top coat instead of being mixed in with the color polish. This means un-ending holographic glitter possibilities >:3 fufufuu ~

I laid down two coats of Nail Inc.'s Chelsea, and then stamped with China Glaze – Magical, a muted pinkish gold metallic. I finished it off with the Donmar top coat and voila! Its like a party on my fingertips :P

I used a couple different Konad plates for this look. I started out with the bows and hearts from m59 on my thumbs, index, and ring fingers. Then I used the central design from m38 for my middle finger. Last but not least I finished up with some stars from m3 on my pinky nails. :D

Cheers with my champagne ~

Thanks for reading! And I hope you all are having a wonderful start to the new year!

Thursday, November 10, 2011

Sail Away with Panda Nails

There are actually two manicures in this post :P Since I had a nail party with a couple of the girls a few weeks back and wanted to share the pictures with you all.

I did a Sailor theme for one of my gals per her request. (This was actually at the tail end of summer just as the Nautical trend was on its last legs).

Base color is Sally Hansen's Xtreme Wear – Blue it. I then stamped Konad and Bundle Monster plates with Insta-Dri – Whirlwind White and some China Glaze Gold in Passion.

Finally added some sparkle with Milani Jewel FX in Gold; which I nabbed from Target for like four bucks. These are big hexagon shaped glitters suspended in a clear base.

I've seen some swatches where people take the time to layer the gold glitter to canvas the whole nail and it is GORGEOUS!!! *g* I'm excited to try that look out too ~ Always Love me some glitters ^_^

My other girl did her own nails and they turned out adorable so I had to snap a few pictures to share.

Its Paws and Pandas!!! I love the one on her middle finger because he looks like he has a little mustache. XD

A close up of the “cute” one on her thumb.

She used Sally Hansen's Whirlwind White polish and a really old bottle of Wet n' Wild – Black Fog. Her main weapon of choice was a toothpick! I mean c'mon I need to use like five different dotting tools to be happy and she can whip this out with a toothpick? I'm telling ya this girl is amazing. She also does a really cute strawberry manicure I want to try sometime.

Well Til next time mateys! Argh ~ !

Tuesday, September 27, 2011

Silver and Black Konad Lace

Back again with a sassy silver NOTD look for you! This time I had a some fun with my Konad stamps (which I am LOVING to death!!!)

These nails make me feel like elegant, victorian glam and I am totally digging the sharp contrast between the silver and black.

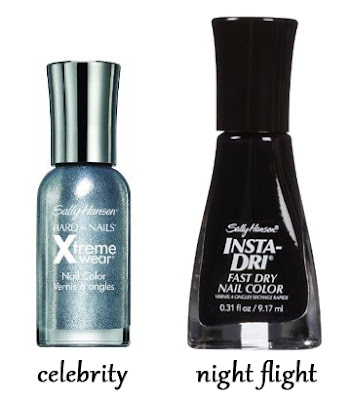
I did a Silver base coat in Sally Hansen Xtreme Wear – Celebrity and stamped Konad plates in Sally Hansen Insta Dri – Night Flight. Picked up both of these colors from Ulta for $2.59 and $4.95 respectively and am really happy with them.

This silver is a totally fun attention whore color. You really cannot wear this color without expecting people to notice your polish; its like covering your tips in aluminum foil! :P

And the best part is that it dries super fast! Which is a big plus in my book since when I Konad I find it least painful to use a quick dry polish as your base and an opaque color for your stamping lacquer.

You want the quick dry because the odds are (if you are anal like me) that the first time never turns out right. So you will be wiping your nail to get a clean slate to try, try again quite often. And really, who wants to waste time waiting for your polish to dry when the main course of this event is the stamping!?

The opaque color for stamping is a tip I picked up from prowling the interwebs. It seems that the most popular vote for compatible polishes, aside from the ones that Konad makes, are the following:

-Sally Hansen Insta Dri

- China Glaze metallics

- Polishes that pass the One Coat test (meaning the color is opaque enough and good to go in one coat)

I used Konad plate M69 for my thumb, M57 for my index, middle, and pinky, and stamped M60 on my ring finger.


Finished the whole look off with OPI clear top coat and I was ready to party!