Showing posts with label a-ha moment. Show all posts

Tuesday, May 15, 2012

Ez Pz Fluffy Clouds Nail Art

Happy Tuesday Everyone! 
I'm back again with some cuter than I expected new nail art for you! 
Fluffy Little Clouds! 


I was kinda dry out of inspiration and really loved this Wet n Wild Blue so I just slapped it on my finger tips, going for a normal solid color look. But once it was on, I started getting more in the mood of spring and went all out for something fresh and fun. 


The clouds were actually super easy, for how nice they turned out. My Favorite kind of nail art = Easy! I just took a bigger ball dotting tool and made clusters of dots until you get a nice fluffy blob! 


Zoom out and Voila! Clouds! I think the most important thing about this is the cloud spacing. I was going for a more cartoony look so i spaced them out evenly at a diagonal to one another. 


I showed my co-worker and she said next time I should do sheep. :P I love that idea! Just wondering how to execute it. Something a'la Shawn the Sheep would be awesome! 


Lacquer List: 
Wet n Wild - I need a Refresh-Mint 
Sephora by OPI - A-ha! Moment 


I know its just simple but I hope you all like it <3 

Thanks for reading! 
-wanyachu

Monday, April 9, 2012

Strawberry & Flowers Spring Mani

Happy Manicure Monday!
I hope you all had a fun filled Easter weekend. Even if you aren't celebrating for religious reasons, I'm sure there were lots of chocolate and candies to be had by all. :3 

In light of the lovely weather we have been having lately, 
I wanted to do a fun and fresh Spring look.


And what else says Spring more then some sweet, succulent Strawberreis!?    
Somehow...everything in my life is often associated with foods >_>;;;

So here is my take on the Strawberry Mani.


I know Strawberry Mani is not anything new or groundbreaking, so to jazz it up a bit I decided to throw in some of their cute, little white flowers into the mix. I did the flower with a dotting tool, and then added in some vines with a toothpick to finish off the look. 

I also made a quick little Photo Step - by - Step on how I did my Strawberries.


Lately, I'm really into using shipping labels as my nail art guides. I find them easier to cut into when you are various shapes (like the scalloped edge here) and I love that it isn't sticky until you peel off the back. 

I always have issues with the tape strips sticking everywhere but my nail. So the shipping label was a nice solution. Also I find these labels to be stickier than the normal hole punch protectors.

I cut this edge with some craft scissors, but I'm thinking you might be able to get some interesting shapes with a die cut punch! Can't wait to try! :P 


Here are my nails after Strawberry-ing them all up! I had originally done both hands as the fruit only, but decided that it wasn't exciting enough ^^; 


Lacquer List
Sephora by OPI - Personal Shopper as the red base
China Glaze - Entourage as leaves, vines, and flower centers 
Sephora by OPI - A-ha! Moment as flowers 

Pretty simple, but I think its nice and fresh for spring!. 


So I hope you guys enjoy this look! I think I might try a whole fruit series soon. Just trying to make a list of what other fruits would be Nail-able. If you have any suggestions lemme know in the comments too! 

-wanyachu

Wednesday, April 4, 2012

Easter Bunny Spring Nails & Tutorial

Hiyo! I'm really proud of the manicure I have for you all today! 
I know I've only been posting swatches lately and I started to guilty that I hadn't done any nail art.
But since we are having a little Easter Egg Hunt at work this weekend, I figure I might as well get into the spirit of things and go all out! :D 

So I present to you a fun and fresh Spring inspired Easter Bunny Manicure set! 


I had a lot of fun coming up with this look. And was trying to go for an egg inspired decoration theme. Throw in some bunny rabbits, paw prints and then voila! Done! 


Here is a close up of my two favorite nails! Out of all the rabbits I did, this little guy is by far my favorite. I think it was all the practice on my right hand :P  Also if you guys are interested, I did an easy Bunny Rabbit Nail Art Tutorial here for you so that you can have this cutie too!


I also really loved how these flowers turned out. This is my second time trying out this style. You can check out my first Floral Attempt here at my St. Patty's Day Nails.

Finally the last two nails, For my ring finger I went with a fun Easter Egg Design with Stripes and Dots. And then I added some diagonals with a toothpick to pull it all together. 

My Lacquer List for this Look


Base coat from Left to Right: 
Sally Hansen Hard As Nails - No hard Feelings
Sally Hansen InstaDri - Blue-Away
Sally Hansen InstaDri - Pink Blink

Accent Colors: 
Pa. Dark Pink Sparkle AA20 for the Floral Centers
Sephora by OPI - Never Enough Shoes for Eyes 
Sephora by OPI - A-ha! Moment for the Flowers, Rabbits, Stripes & Dots  
Pa. Light Pink Sparkle A116 for the Bunny Cheeks 

Also, I threw together a cute little Picture Step - by - Step tutorial for you on how to do the Bunny! 
It was really easy and turned out way cuter than I expected. I just used my dotting tool for the most part with varying pressure. 

Well I hope you all enjoy this look! Anyone else getting Festive Fingers for this weekend? I'd love to see too! I'm more into painting Nails than Eggs it seems :P 


Thanks for Dropping by and pleas share if you try out the Bunny! 
-wanyachu  

Thursday, March 15, 2012

Clovers and Stripes St. Patty's Day Nails

Hello lovelies!!! 
I have a quick little manicure for you today. I know I usually post Mondays but, ever since my doggie emergency my Nail schedule has been thrown off. >_< So I hope you'll bear with my as I work my way back on track!!! 


I saw Pauline's flower nails over at omgnoodles and fell in love with the blossoms! (And her too! Her nail art is too awesome for words! This lady is crazy talent <3 ) SoI though I might give it a try but wanted to do them as shamrocks instead....unfortunately it was kinda fail T_T 


They still look like flowers to me...I should've added stems or something but I'm pretty sure that is beyond my skill level. 


The base is Sally Hansen Xtreme wear in Mint Sorbet. I am in LOVE with this lovely pastel shade of green and just had to have it when I saw it at the store. :3 I had been looking for a fresh minty color for quiet a while but I find that many of them are either too green or too blue for my taste. However, this polish definitely found the happy medium and brought my minty hunt to a happy conclusion. 


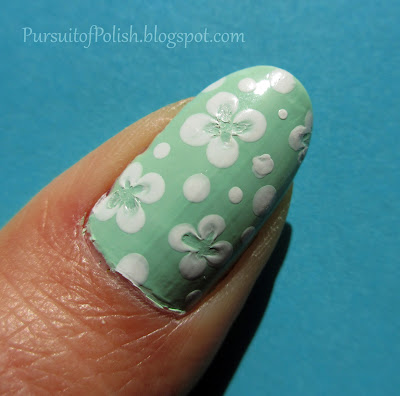
 I used my dotting tool and some scotch tape to make the "clovers," dots and stripes with OPI for Sephora in A-ha! Moment. Then finished up with some top coat loving. 

Looking closely at it now I wish I had just made them flowers instead :P Then I could've covered up the middles with some cute crystal or polish.


Lots of people thing they are more Easter-y and I can totally see why. They really do look like Easter Eggs especially with the pastel color, dots and stripes. >_>;;; So I guess I already have a plan for that week's nails! 


Hope you all enjoy and have a deliciously filled St. Patricks day ^___^ Honestly isn't this Holiday mostly about the good food and drinking? Whats not to enjoy!? 

-wanyachu    

Monday, February 27, 2012

Mod Plum & Green Two Tone Manicure Tutorial

Hi lovelies, I'm back again for another Manicure Monday look!
This time I tried to do something a little different and put together a picture tutorial for you all. 
(If impatient click here for Picture Tutorial)


But first here is the completed look I'll be sporting this week on my nails. I wanted to do something colorful and fun for the lovely weather we have been having in the Golden state.  


The color palette for this look actually comes from some bowls we are selling at work :P I thought it was such a fresh combo of lime and plum that I couldn't resist trying it out on my tips. So see! Work is not a complete drain of creative energy, sometimes it can be an inspiration as well!

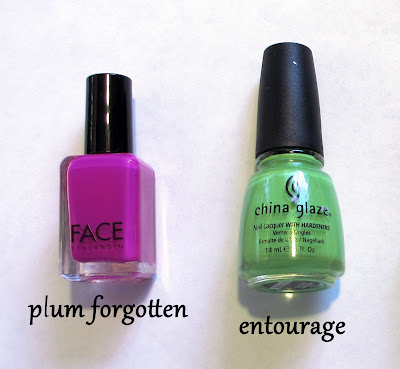
Luckily enough I went home and dug through my polish box and came up with these two beauties.


The Nail Polishes:

I received the FACE polish as a gift, but never got a chance to try it out. The color is a sensuous medium tone violet called, Plum Forgotten. I had never heard of their polishes before and was pleasantly surprised with how smooth and saturated this lacquer is. Interestingly enough it also dries slightly matte, but you can't tell here because I top coated over the final look.

The lime green on the left is China Glaze in Entourage. This is a very saturated yellow-green, bordering on chartreuse with fun micro glitter. I've actually had this polish for quite a while, but it is just so overpoweringly electric when worn by itself I never gave it much thought. So when I stumbled upon it again I realized what great potential it had as an accent color! And thus this look was born! :3


So without further ado here is my little step by step. 
Lemme know if you guys have any questions!


Tutorial

Step 0: Paint your nails and let completely dry! Sorry forgot to take a picture of that but ya'll know the drill. I did alternating colors of Plum Forgotten and Entourage.

Step 1: To make a clean curve between the two colors I hole punched circles out of envelope labels. I wanted to use those paper hole protector thingys...what are they called even!? The reinforcement stickers that kind of look like donuts....

Anyways, the point is that I didn't have any, probably because I don't even know what they are called =_= So I improvised!

You can really use anything that will stick to your nail and has a curve to it. I even had a friend once who cut masking tape to match the arc she wanted...but that's super dedication I don't have v_v;

Step 2: Stick your guide (tape, label, hole protector...) onto your nail! Be sure to center the curve or else you will get crooked a crooked arc. Make sure the edge where you will be paint over is securely pressed down so you don't get any leaks.

Then go to town and Paint 'em up!

Step 3: Quickly but carefully remove your guide. I suggest taking it off right after you lay down your lacquer. You don't want to leave your guide on for too long, or else any leaks that did manage to seep under will get a chance to dry.

***more taping off tips at my Pink Petite Four Tape Tutorial***

Step 4: Get out a dotting tool (toothpick, bobby pin, whatever floats your boat) and go dot away! Here I used OPI for Sephora – You don't know Jacques and A-Ha! Moment.

Ta dah! Now you're done and ready to rock this playful retro, manicure!
Sorry ended up being more wordy that I had anticipated. So to make it up for your candy starved eyes some more pretty pictures:P


Are you guys sick of seeing my garden foliage yet?
I will try to come up with more interesting props next time!


Thank you for reading! And please leave me any questions, comments, criticism, love...it will all be much appreciated!!!

-wanyachu  

Monday, February 20, 2012

Galaxy Pearls Half Moon Mani w/ Zoya!

Happy Manicure Monday again! Hope you all had a great weekend and for those of us lucky enough to still be in school, Huzzah that it is still continuing! :P Thank you presidents!

Since my past few posts have been very Pink oriented, thanks to Valentine's Day, I've decided to go in a totally opposite direction with a purplish gray for today's look. *ta dah*


I've actually been planing to do this look for a while, but never found the right color for it until now :P My sister picked up this lovely, cool toned Zoya gray recently from Ulta and I knew I just had to play with it. <3


This was my first time using a Zoya polish and I am in LOVE! It was soooo smooth going on and opaque enough for just one coat even though the lacquer itself is not thick and gooey. I'm wondering if all of their nail polishes are like this and can't wait to get my hands on more >:3


I topped it off with some Nail Inc. - Donmar collection and am totally digging this look. I mean just look at those flecks reflecting onto my palm *g* so much sparkly love going on I might go blind!!!


And here is my Nail Polish List:

Pretty simple compared to some of my other looks recently. I painted one coat of Zoya – Kelly, for the gray base about 2/3rds the way down my nail. Then I went in with a q-tip and some acetone to get the curved half moon look. I layered on Nail Inc.'s Donmar top coat for some fiery opal flecks and used my dotting tool to trim the bottom of the curve with white dots in OPI for Sephora, A-ha! Moment.


Overall, I think it's a really classy look. The dots remind me of a mini strand of pearls and the sparkles on the darker background are like a galaxy full of stars! *___* Fufufuuu so cheesy but now you know where I got the blog title from.


Had lots of good photos IMO this time so here are a few extra. Hope you all enjoy. And let me know if you have any questions or comments <3


-wanyachu 

Monday, February 13, 2012

Valentine's Day Manicure – Cracked & Konad

Hello all! This is the last of my little Valentine's Day Mani series. And the one I'll actually be sporting on that special day. (Which I'm actually doing nothing for ~_~;;; )


I wanted to do something fun and festive so I opted for a different look on each nail.


This look definitely screams Valentine's day to me and I wish I had done it for the Vday part we had at work. :P


I might have gone a little overboard. These nails have everything from nail stamps, polka dots, and even crackled polish! I really didn't hold back. Well I guess I left out the crystals :P


I used a rich red lacquer, OPI for Sephora – Personal Shopper, for my thumbs, pinky fingers and the free hand heart on my index. Then I painted Sally Hansen – Pink Blink on my ring and index fingers. I also used it to stamp Konad M59 and M56 and do the polka dots over the white, A-ha! Moment, on my middle finger. I finally finished off with China Glaze – Broken Hearted crackle, a gorgeous Hot Pink just fit for the occasion!


Well I hope you all have a great Valentine's Day! And I can't wait to see what looks you all have been sporting for the Day of Hearts!


-wanyachu